Installing carpet can be quite an undertaking. The cost for carpet installation in a master bedroom can run well over $1,500. Add to that the price of carpet — and the demanding task — those interested in installing carpet as a kid-friendly, durable, cozy alternative to other flooring, often reconsider. However, installing carpet doesn’t have to be a challenging undertaking. Instead, this quick guide ensures you’ll install carpet in no time.
How to Install Carpet in 6 Easy Steps
1. Measure the Room + Gather the Materials
Begin by measuring the width and length of the room, add about 3 inches to the figure to make contingencies for doorways, and additional 3 inches for leeway.
You can multiply these figures to get the room’s square footage, but the most important aspect is knowing the length and width of the room, as that is what a flooring company will want.
For tools, you’ll need:
- Duct tape
- Tape measure
- Chalk
- Utility knife
- Tack strips
- Seaming tape
- Knee pads
- Knee kicker
- Power stretcher
- Rolling pin or carpet roller
- Seaming iron
If you’re completing a carpet installation on concrete, also get:
- Masonry nails
- Carpet adhesive
- Cement-based waterproof filler
- Construction adhesive
2. Prepare the Space
Remove baseboards, sand the floor to remove residue from the floor, and check for any issues on the subfloor, replacing if that is necessary. If you’re working with concrete, fill any cracks with waterproof filler.
3. Install Tack Strip
Now, install tack strips along the perimeter of every wall, excluding doorways. Ensure there are no spaces between each strip while maintaining about half an inch from the wall.
If you’re installing on wood, nail the tack strip into the baseboard, but on concrete, use adhesive before nailing it into the concrete with masonry nails.
4. Install Underlay
The underlay prevents the carpet from bunching up and increases the feeling of comfort. When purchasing the underlay, get a synthetic underlay to prevent condensation and possible mold.
The underlay shouldn’t overlap the tack strips. You can avoid that by ensuring it’s cut to size. Then you can either use a nail gun if you’re installing on baseboards or adhesive if you’re installing on concrete.
5. Cut the Carpet to Size
Cut the carpet into strips, maintaining about 6 inches where the carpet will meet the wall to avoid having short sections. It doesn’t have to be perfect now. You can fix any uneven cutting when you lay the carpet, as most carpets are more forgiving.
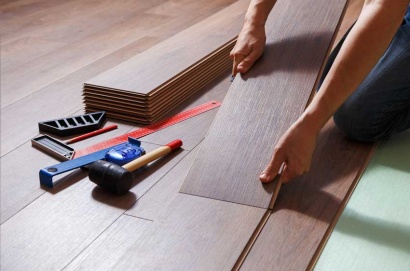
6. Lay the Carpet
Start laying the carpet at one end of the room and pull in the direction of the opposite end before laying it down when it’s taut. Using a chalk line as a guide, cut away the excess with a utility knife. Lay the second piece a few inches over the first. That way, when you cut through the second strip, you’ll be cutting through both pieces ensuring they fit perfectly, regardless of imperfections. Don’t forget to lay seaming tape with the adhesive side up. Use a steam iron to activate the adhesive.
Pro Tip: To know how to install carpet like a professional, ensure the piling lines up on each strip.
7. Stretch the Carpet
Use a knee kicker to stretch the carpet. Start at the center of the wall, and – with your knee pads on – kick your knee into the tool to ensure the carpet catches onto the tack strip beneath. Do this along each wall, and cut off the excess with a utility knife.
Voila! Your carpet’s installed.
While laying carpet can be done by yourself, a professional carpet installation company in the metro D.C. area can make the process quick, easy, efficient, and save you time and hassle.